

Agency and Studio Sites
“Do you build Webflow sites for SaaS?” The chatbot explains your services, shows the right case study and books the discovery call.
Answer Questions. Capture Leads. Grow Your Business.
Add a Webflow chatbot that answers visitor questions, captures qualified leads and hands conversations to your team, without touching your design. Build it in PluginChatBot, paste one embed code into Webflow, publish, and your site is helping visitors 24/7.



Real Webflow Use Cases
Webflow sites are built to convert, but visitors still leave when they cannot find an answer. The chatbot answers from your own content, so each type of site gets help that fits it.
“Do you build Webflow sites for SaaS?” The chatbot explains your services, shows the right case study and books the discovery call.

“Is there a free trial?” It answers plan and feature questions from your pricing and docs, then sends ready buyers to sign up.

“How much does a quote cost?” It explains your process and pricing, then collects the visitor’s details for a follow-up.

“Are you open on Saturday?” It shares hours, locations and contact details, and takes booking enquiries after hours.

“Are you available for a project in March?” It answers availability and rate questions and passes serious enquiries to you.
Webflow Installation
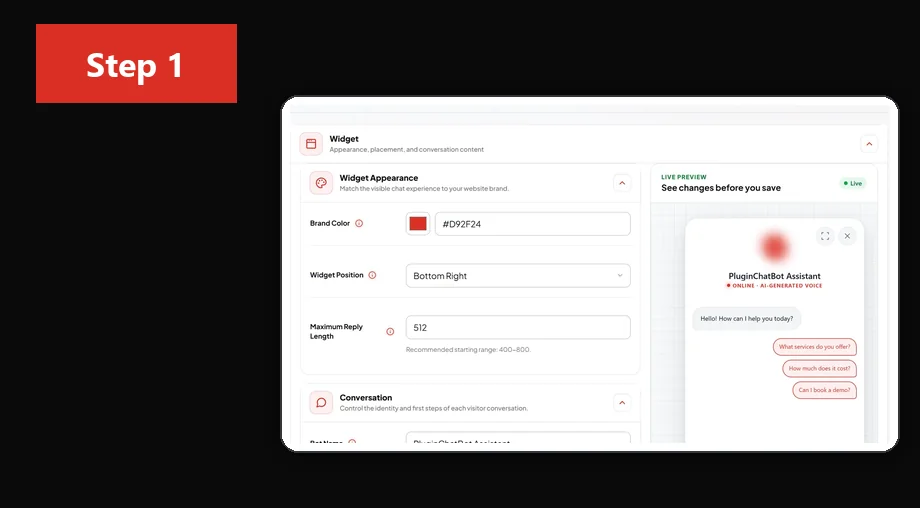
Sign up or log in to PluginChatBot, create your chatbot in AI Builder, and set its look and tone to match your Webflow brand. Add your website content in the Knowledge step.
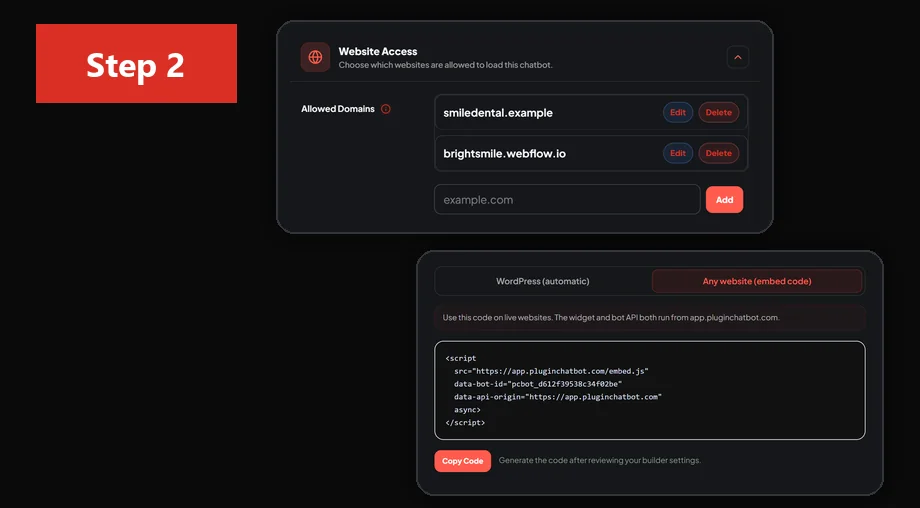
In AI Builder, add your webflow.io address and your custom domain under Website Access → Allowed Domains. Then, in the Install step, choose Any website and click Copy Code.

In Webflow, open Site settings → Custom code and paste the code into Footer code. Save, then publish your site. Needs a paid Webflow site plan.
One page only? Open that page’s Page settings → Custom code and paste the code into Before </body> tag instead.
<script
  src="https://app.pluginchatbot.com/embed.js"
  data-bot-id="your-bot-id"
  data-api-origin="https://app.pluginchatbot.com"
  async>
</script>Using another platform too? See the full installation guide.
For Webflow Developers and Agencies
Building Webflow sites for clients? Keep each client’s chatbot, conversations and leads separate, test before launch and hand over a finished setup.
Give every client site its own workspace, chatbot, inbox and leads, so nothing mixes between clients.
Add the webflow.io staging domain to Allowed Domains, publish to staging and test the chatbot before the client’s domain goes live.
Allowed Domains stops the embed code working anywhere else, so a copied snippet cannot run on another site. Read more on security and control.
Site-wide Footer code survives redesigns, new pages and CMS changes, so the chatbot keeps working when the client edits their site.
Invite the client as an Admin or User on their workspace so they can read conversations and follow up leads without changing your setup.
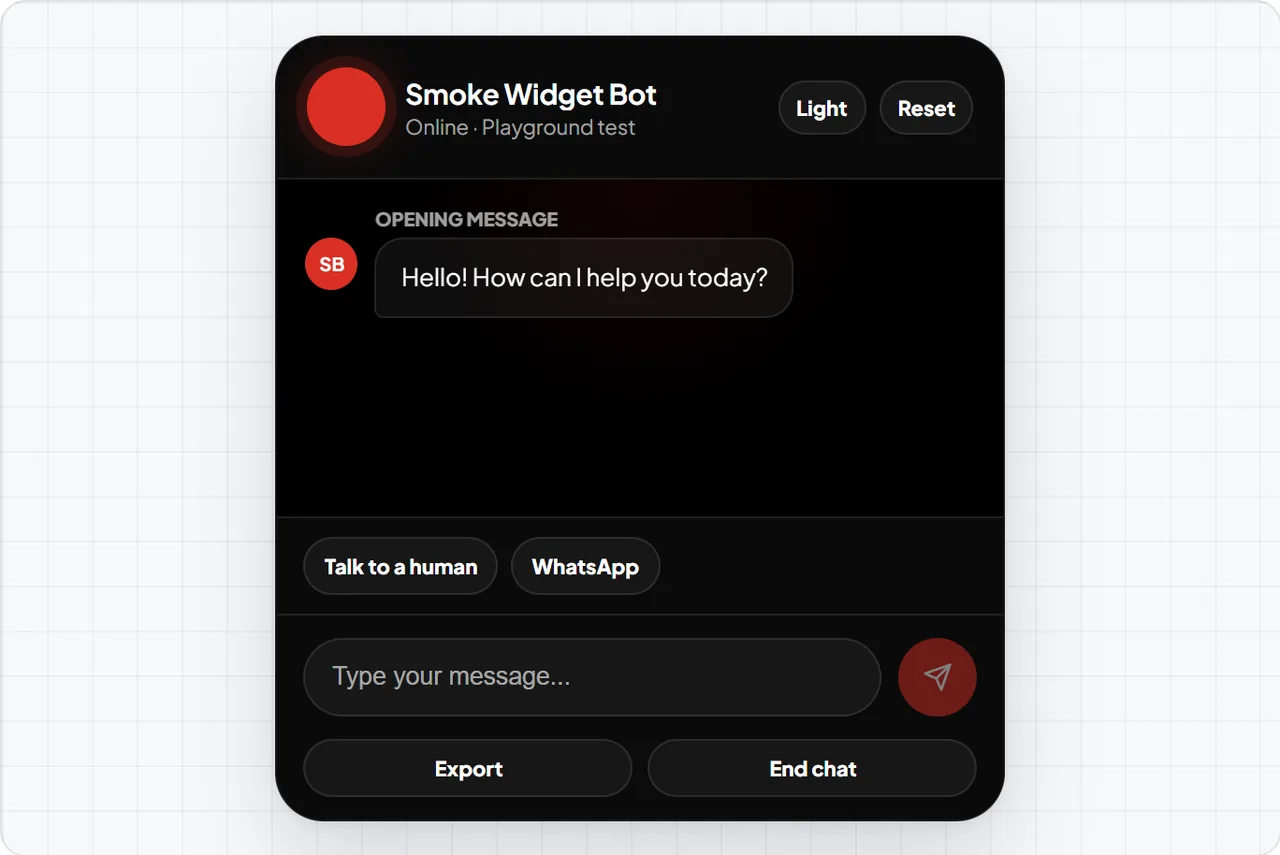
Responsive by Default
The chatbot resizes to fit phones and tablets on its own. Before you launch, run these quick checks so it sits well with your Webflow layout.
Customisation
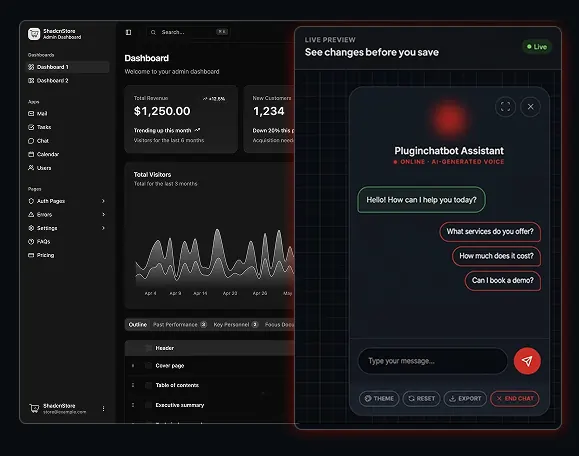
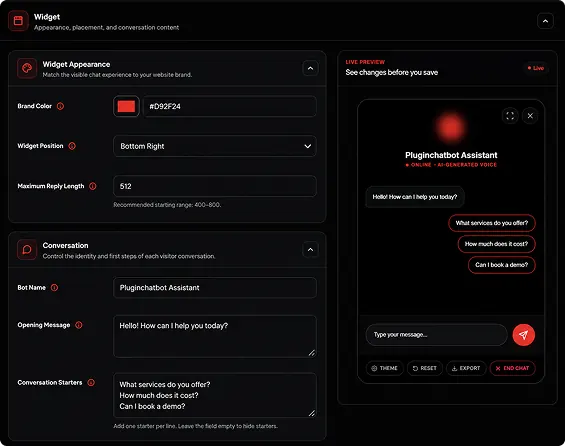
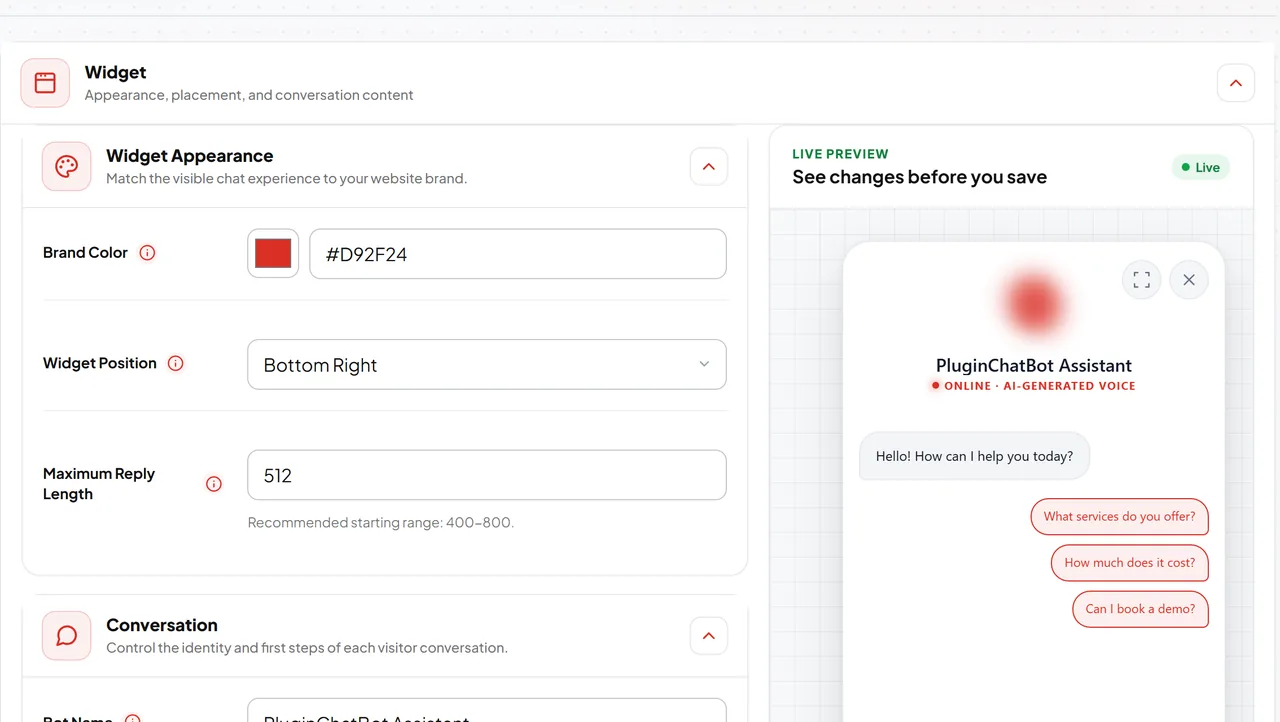
Make the chatbot look like part of your Webflow site and answer from your own content. Every change shows in the live preview before you save.
Collect Visitor Details for Follow-Up
Turn Webflow visitors into leads during the conversation. Every lead lands on your Leads page with where it came from, and can sync to HubSpot automatically. Learn more about chatbot lead capture.
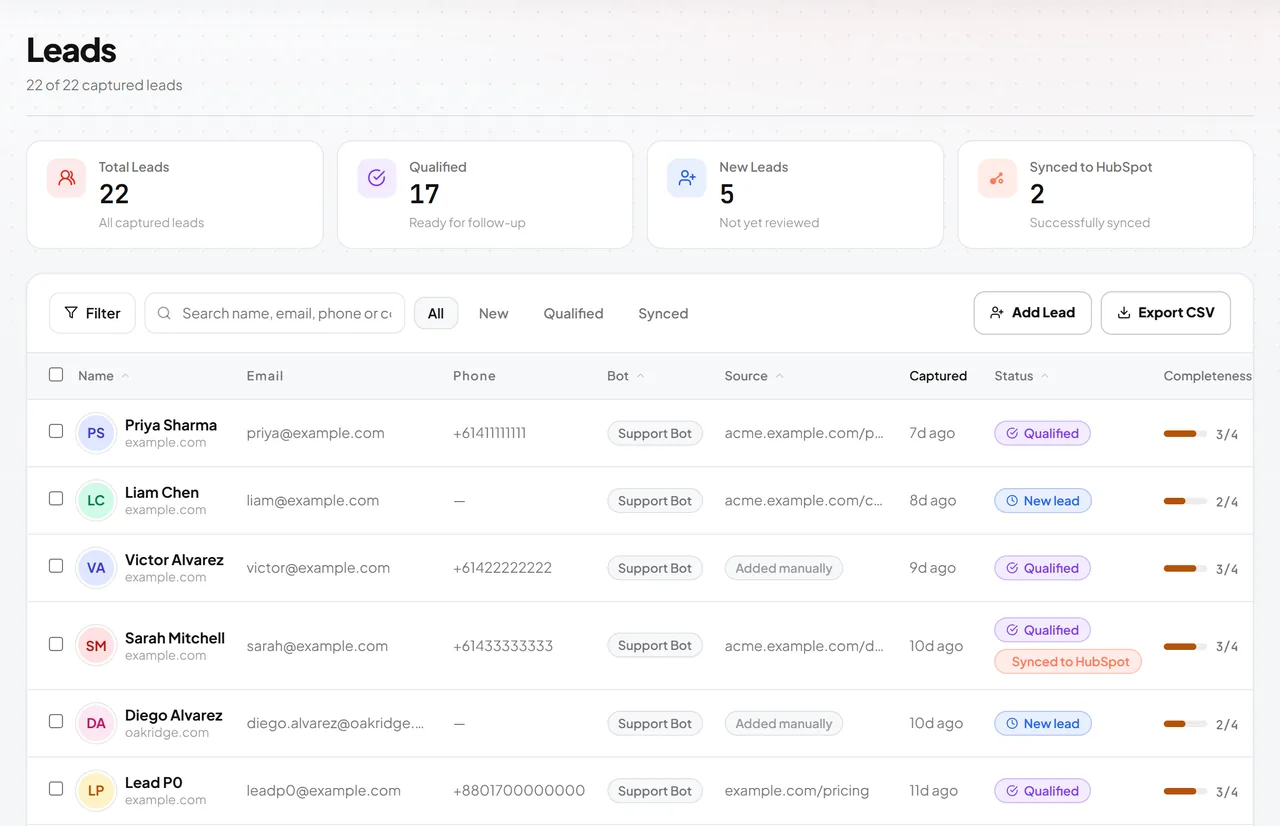
Ask for a name, email and phone number at the right moment in the chat, or before the chat starts with Visitor Capture.
Every chat is saved with the Webflow page it started on, so your team knows exactly what the visitor asked.
Leads with complete details are marked qualified, so your team can follow up the best ones first.
Send new leads, chat transcripts and AI summaries to your CRM with the HubSpot integration.
When a visitor asks for a human, live chat handoff passes the conversation to your team in the inbox.
FAQs
Still deciding? Compare plans on the pricing page or start free and install it on your Webflow site today.
 What is the PluginChatBot Webflow chatbot?
PluginChatBot is an AI chatbot for Webflow websites. It answers visitor questions using your own business information, captures leads during the conversation and can hand a chat over to your team. You add it to Webflow with one embed code.
 How do I add a chatbot to my Webflow site?
Build your chatbot in PluginChatBot, copy the embed code, then in Webflow open Site settings, Custom code, and paste it into the Footer code box. Save and publish your site. The chatbot then appears on every published page.
 Do I need a paid Webflow plan?
Yes. Webflow only runs custom code on sites with a paid site plan. On a free Webflow plan the embed code is saved but the chatbot does not load on the published site.
 Can I show the chatbot on only some Webflow pages?
Yes. Instead of the site-wide Footer code, paste the embed code into a single page under Page settings, Custom code, Before </body> tag. The chatbot then loads only on that page, which suits landing pages and pricing pages.
 Why does the chatbot not appear in the Webflow Designer?
Webflow does not run custom code inside the Designer or the Editor. Publish the site and open the published URL, either your webflow.io staging domain or your custom domain, to see and test the chatbot.
Will the chatbot slow down my Webflow site?No. The embed code loads asynchronously after your page, so your Webflow content, layout and animations load first and the chatbot button appears once it is ready.
Does it work with Webflow CMS and Ecommerce pages?Yes. Code in the site-wide Footer code box runs on every published page, including CMS collection pages, blog posts and Ecommerce product pages.
Can I customise the chatbot to match my Webflow design?Yes. You can set the brand colour, the corner it sits in, the chatbot name and profile image, the opening message and the conversation starters, and preview every change live before you save.
 Can the chatbot capture leads and send them to HubSpot?
Yes. The chatbot can collect a visitor’s name, email and phone number. Leads appear on the Leads page in your PluginChatBot dashboard and can sync to HubSpot automatically.
Is PluginChatBot suitable for Webflow agencies?Yes. Agencies can give each client site its own workspace and chatbot, test on the webflow.io staging domain, lock the chatbot to the client’s domains and add the client as a user when the site is handed over.
Get Started
Create your chatbot free, paste one embed code into Webflow and publish. Prefer a walkthrough? Book a demo and we will set it up with you.
Customer Support: +61 3 9969 2102


